Fixing LaserJet network connectivity
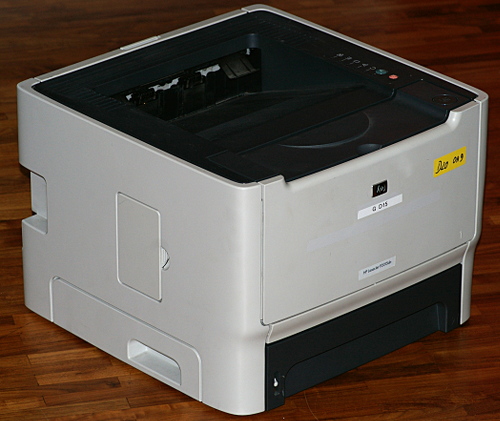
I recently bought a used HP LaserJet P2015dn printer as a replacement for a Brother HL-2030. The Brother printer annoyed me with its sheer never-ending fan which came on even when only a single page was printed. I know these LaserJet printers from work, where they are reliable and quiet work horses. However, soon after I had set it up in my home network, it would not print every so often. The computer would complain it was ‘missing’, and the printer’s own maintenance web page would not respond.
It turns out that this is actually a known problem: Evidently the so-called “formatter board”, the main board of the printer, has faulty conductors. This not only affects the P2015 model. The remedy for this problem is a rather weird one, but it actually works: Bake the board! I did it, and it did fix my printer.
Since several people on the internet have asked for details about the procedure, I decided to write a photo story about it.
Disclaimer: The following description is for your information only. I assume no responsibility if anything breaks or if anybody is injured if you attempt to do it yourself. Do not follow these steps if you are not prepared for having to buy entirely new equipment.
Step 1: Remove the left cover
Before opening the printer, make sure it is not connected to the power supply.
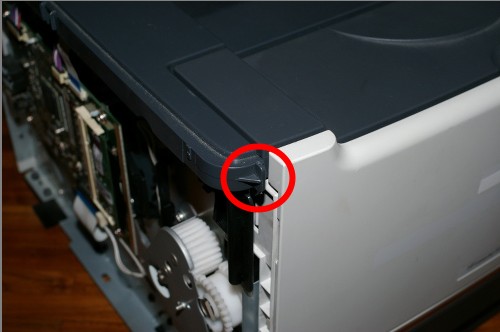
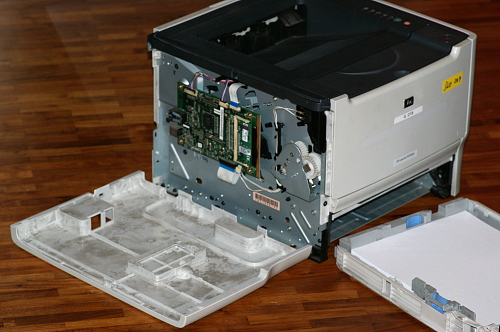
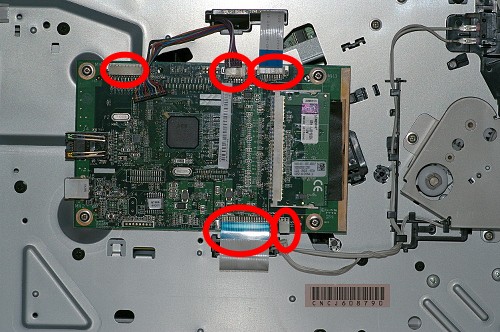
The formatter board is behind the left cover of the printer. Tools are not necessarily needed to remove the left cover. It is important to lift the cover off the printer starting at the rear.
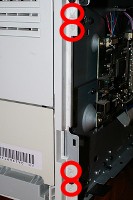
At the top left corner on the front, there is a big latch that prevents the cover from coming off at the front first, so you really must work your way from the back to the front.
It is not absolutely necessary to have the paper tray removed.
Step 2: Disconnect the cables
There are several delicate cables that have to be pulled off carefully. They can be removed from the ports by pulling away from the board. I used the tips of my fingers of both hands to carefully apply force without twisting the cables.
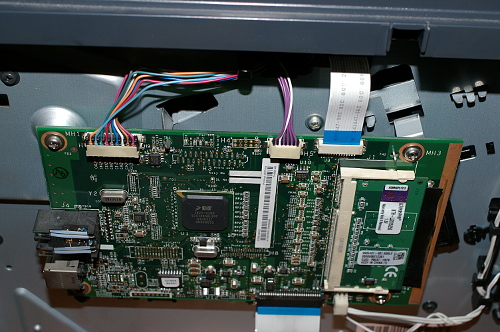
Step 3: Remove the board
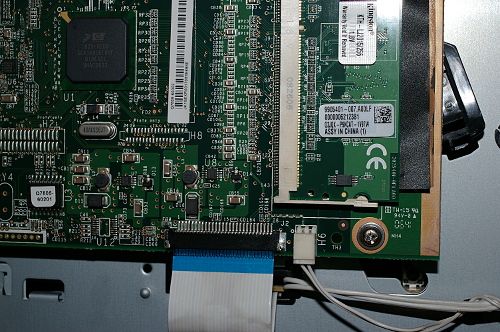
Once the cables are removed, you can easily remove the entire board by removing the little screws, then pulling the board away from the printer.
Make sure to also remove an extra memory board if you have one. Also remove the black plastic cover – it’s just glued to the board, it comes off easily and will still stick to the board when put back on later.
Step 4: Bake the board
Pre-heat your oven to 180-200 °C. Prop the board up using little aluminum foil balls. Place it on an oven tray, and bake it for 8 minutes. Let it cool down at room temperature for at least 15 minutes.
Step 5: Put everything back together
Putting everything back together is very easy. When I first did this, I must have put on the cables incorrectly; the ‘ready’ light would no longer turn on (although the printer worked perfectly). I took everything apart again, took a couple of pictures for this blog, reconnected the cables carefully, and now the ‘ready’ light comes on again just fine.
If it fails again
As someone pointed out, the printer may start to fail again after a while. I have not yet experienced another failure yet. If it fails again, either bake the board again, or try to cool down the board as described.
Other people’s reports
- http://www.thice.nl/repair-a-broken-hp-laserjet-printer-by-baking-it
- http://www.youtube.com/watch?v=x1acw-7kMws
- http://www.youtube.com/watch?v=JRBTrYutFbc
and many more…
Conclusion
Reading the many reports on the internet that deal with this problem, I get the impression that this is a systematic problem, a ‘bug’ in the manufacturing process. It reminds me of my very first own printer, a LaserJet 5L, that started to have incurable paper feed problems after a while. Back in the day, my dealer told me that this was a ‘known problem with this model’. After the 5L, I had an Epson EPL-5800 that never failed; unfortunately, I gave it to someone else in the family. The Brother printer was too noisy; and now my second LaserJet printer turns out to have a systematic problem as well. Really makes me wonder…
Post date
Wed 20 Nov 2013Tags
Share
Recent posts
Exit ThinkPad T430s, enter ThinkPad T480s
Linux and VirtualBox on a T480s with high-resolution display
What I like and dislike about Ubuntu 18.04